Learn how to do Tunisian crochet in easy step-by-step
Known as Tunisian or Afghan crochet, this technique creates a fabric that looks almost woven or knitted. In contrast to traditional crochet, all your stitches are held on a long hook which is great for maintaining tension – this is often a problem area for knitters trying regular crochet for the first time. This method is actually much closer to knitting; the fabric produced is quite dense rather than lacy and the reverse side of the basic fabric even looks like knitting! As with both knitting and crochet there are many different Tunisian stitch patterns. In this tutorial we will show you how to get started, master Tunisian simple and purl stitches then combine them together to make a honeycomb stitch.
What crochet hook is used for Tunisian crochet?
Rather than a traditional crochet hook, a longer hook is required for Tunisian crochet because the stitches sit along the length of the hook. In this tutorial, we used Denise interchangeable crochet hooks with a cord and an end-stop. You can also purchase straight varieties that look like long knitting needles with a hook at the end.
How do I start a Tunisian crochet project?
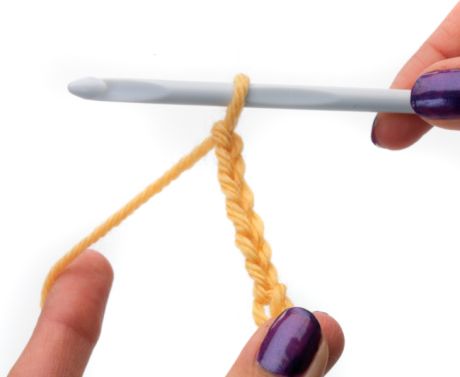
Tunisian crochet begins with a standard crochet foundation chain (ch).
How to do it: Make a slip knot and place it on the hook. Wrap the yarn around the hook and pull the hook through the loop. This is your first chain. Continue in this way until you have the correct number of chain stitches (NOTE: do not count the loop on the hook as a stitch).
How to work the first row
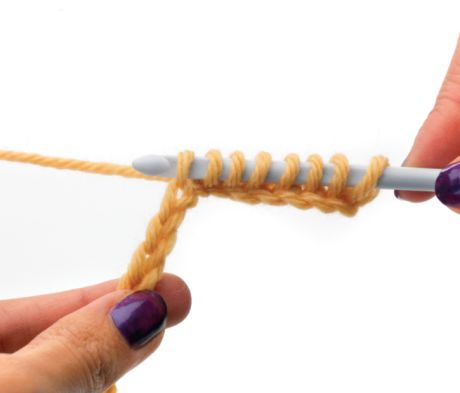
In this technique all the stitches are held along the length of the hook, so to start, you need to transfer your chain stitches onto the hook. This is called ‘picking up’ stitches or sometimes, ‘pulling up a loop’.
How to do it: insert the hook into the first chain, wrap the yarn around the hook, pull it through the first loop only, leaving two loops on your hook. Repeat this until you have picked up all the chain stitches.
What is a return pass?
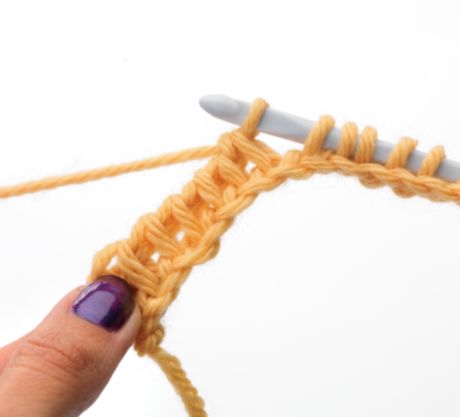
In Tunisian crochet, you do not turn your work. That’s because each row is made up of a forward pass and a return pass (RP). After picking up your stitches (the forward pass), you need to return back to the beginning again.
How to do it: wrap the yarn around the hook, pull it through the first loop on your hook. * Wrap the yarn around the hook, pull it through the next two loops on your hook. Repeat from * until one loop remains on your hook. Every return pass will be worked in this way unless otherwise stated.
How to work Tunisian simple stitch (TSS)
This is the easiest stitch to master.
Step 1: Miss the edge stitch and, with the yarn at the back, insert the hook into the vertical bar at the front of the stitch. Wrap the yarn around the hook and pull through the bar, leaving the loop on the hook.
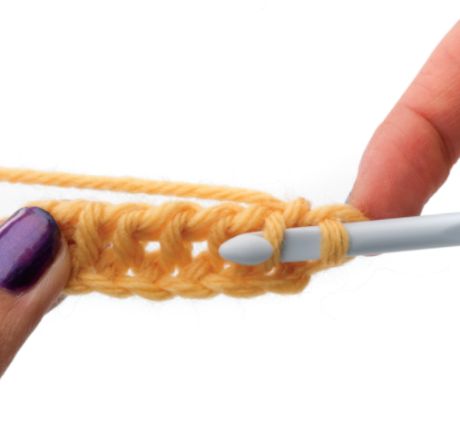
Step 2: Continue along the row in this way. Work into the edge stitch at the end of the row. This creates a row of vertical bars. Work a return pass before moving onto the next row.
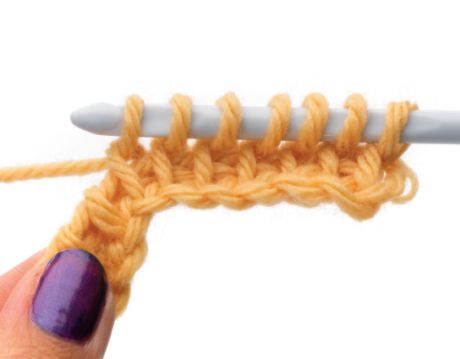
How to work Tunisian purl stitch (TPS)
Tunisian purl stitch creates a row of horizontal bumps and can add texture to your pattern.
Step 1: Miss the edge stitch. Move the yarn to the front of the work and insert the hook into the vertical bar at the front of the stitch. Wrap the yarn around the hook from back to front and pull through the bar, leaving the loop on the hook.
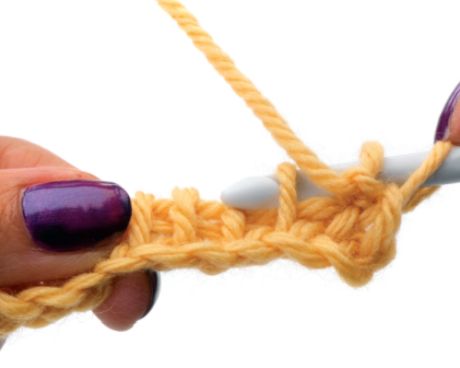
Step 2: Continue along the row in this way until you reach the last stitch. Work a TSS in the edge stitch. Work a return pass to finish the row.
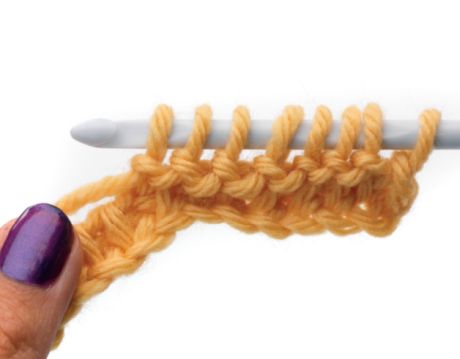
How to work Tunisian honeycomb stitch
The honeycomb stitch pattern is made up of alternating one TSS and one TPS stitch on each row. Don’t forget the return pass. On the following row, continue to alternate, working TSS in TPS stitches and vice versa.
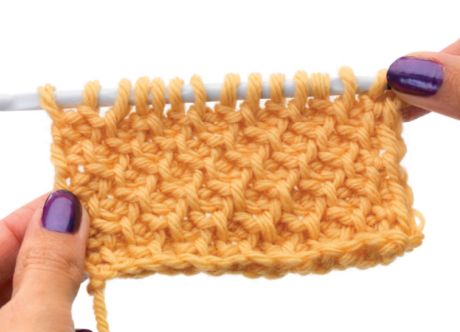
How to finish Tunisian crochet
After your final return pass, you will be ready to fasten off. Try to maintain your stitch pattern for a neat finish.
How to do it: Miss the edge stitch, * insert the hook into bar (either TSS or TPS-wise according to pattern), wrap the yarn around the hook, and pull it through both loops on the hook. Repeat from * to end, working a TSS into the last edge stitch. Cut the yarn and pull it through the last stitch to secure.
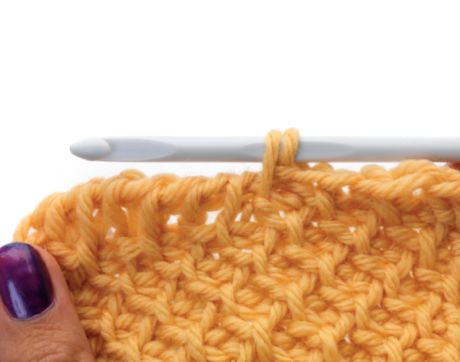
We hope you enjoyed learning this great technique! Join Let’s Knit Together* for exclusive access to more how-to guides
*T&Cs apply


_333_180_c1.png)
_333_180_c1.png)

_333_180_c1.png)
 Baby
Baby
 Toys
Toys
 Garments
 Crochet
 Homewares
 Dolls
Dolls


Share