How to: work rib stitch
video by
Let's Knit Together
- Overview
- Practical Guides
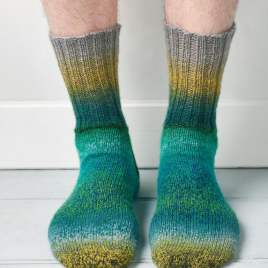
Rib stitch creates a stretchy fabric and can be used for a whole garment or to add a fitted, elastic edging. It's created by knitting the knit stitches and purling the purl stitches on every row.
It’s essential to move the yarn between – not around – the needles when changing between knit and purl stitches, as otherwise you may accidentally increase the number of stitches.
Once you have got the hang of knit and purl stitches, you’ll be ready to work a pattern that involves rib stitch. Knit and purl stitches are alternated on the same row, and then above each other on subsequent rows to form regular columns. Once you have worked a couple of rows, the rib pattern will really start to form and be easier to follow, but pay close attention all the same as you’ll want to knit the V knit stitches and purl the purl ‘bump’ stitches. A rib created from two knit then two purl stitches would be written as 2x2 or (k2, p2), but you may also find patterns with an uneven number of stitches, such as 3x2. The knit stitches lie flat and are raised against the purl ones, so a rib with a higher number of knit stitches will produce a flatter finish, while a higher number of purl stitches will really make the purl columns stand out. There are several variations on this basic rib stitch, with more deeply textured rib patterns – such as Fishermans’ rib – created by working into stitches slightly differently to make a thicker fabric, or twisting stitches for a more decorative version. Rib is a popular choice for lower edgings as, unlike stocking stitch, it doesn’t curl up along the cast-on edge, but you will be changing from rib stitch to stocking stitch, so expect to change needles, as rib is often worked on a smaller size.








_268_268_64_c1.jpg)


