How to: add beads with a crochet hook
video by
Let's Knit Together
- Overview
- Practical Guides
There are two ways to ‘knit in’ beads to your knitting for an extra sparkle or interest, and for this easy technique you’ll need a fine crochet hook that is able to pass through the hole in your bead.
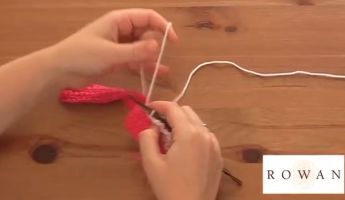
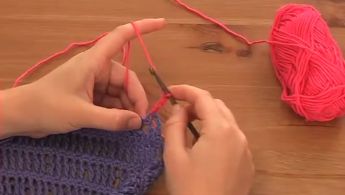
Beads come in a fantastic range of colours, shapes and sizes, and you can always simply sew any bead on, assuming you can secure it to your knitted fabric and it won't adversely affect the drape. However, if they are going to be an integral part if the knitting, with the yarn passing going through the bead centre, make sure that the diameter of the hole can take one, or as with this technique, two strands of yarn, and you have a small enough hook to draw them through. Your pattern will normally be quite specific as to which beads to obtain or you can search for knitting/crochet beads that will have larger and more standard-sized holes, but be aware different manufacturers may have slightly different size guides, so do check carefully that it will suit your needs. You’ll also need a fine crochet hook that can pass through the bead and pull a stitch loop, that is two strands of yarn, through. A 1mm crochet hook is often recommended as a guide, but it will depend on your bead diameter. In a pattern, where to place a bead may just be part of the regular instruction, and is often abbreviated to ‘pb’ for ‘place bead’. Alternatively, the bead pattern may also be shown in a chart form, with the bead being given a symbol. Charts are usually read from the bottom up, and right to left for knit rows, and left to right for purl rows. Always check the key and follow the chart, taking extra care with lacy patterns. In stocking stitch, the bead sits at the bottom of the V on the knit side and pinches it a tad, but it stands out really nicely against the stitches, but is less obvious on the purl side. As there are two ways to integrate beads into your knitting, you’ll need to check the special abbreviations for the specific method, and use what is recommended – otherwise the choice is yours. This technique works the same way whether you are placing the bead on a knit or a purl stitch. Have your beads ready in an open shallow container that you can easily dip into with your crochet hook, and small enough so that you don't have to chase the beads around too much! Work the pattern up to the stitch where you need to add your bead. Place a bead on the crochet hook, then slip the next stitch straight onto the hook. Draw the bead down the crochet hook and onto the stitch, then return the stitch to the left-hand needle in the correct orientation, and work the stitch as indicated. Remember, you can always have a practice on a small sample of just a few stitches to get this technique just right. The aim is to pull the yarn through cleanly, without splitting it, but this can be fiddly as the crochet hook is so small. You may find it helps to have the hook facing upwards, and tension the stitch slightly beneath, as you can draw the hook through the bead – and don't be surprised to find yourself using fingers as well. TIP If you find the crochet hook too fiddly, cut a short length of fine wire, 5-6cm long, and fold it in half. Slip the stitch onto the wire to hold it, then slide the bead down the wire and onto the stitch, then remove the wire and return the stitch to the left-hand needle to work. Finally, if you think you’ll need to regularly wash your beaded item, do a little sample in the project yarn and wash it according to the yarn ball information. Be aware that plastic beads may fade, coated beads may peel, and wooden beads may only be suitable for hand washing, if at all.


